The best way to set up a BAC’s network connection is to plug it into your main router, or to a connected Ethernet switch. This allows the BAC to get an IP address from your router’s built in “DHCP Server”, which is a piece of software that controls your network and hands out IP addresses. It ensures that any other computer on your network will be able to access the BAC, making it easy to integrate with M3 and other software packages.
Sometimes, you might need to configure your BAC without access to your router, though. If you’re using a phone hotspot for connectivity and don’t have an office network, or if you’re setting up a BAC in a new location before a network is available, you might need an alternate approach.
In these situations, you can connect your BAC directly to your computer via an Ethernet cable. In some cases, this will just magically work – so we recommend you start by simply connecting the cable and opening Bad Ass Manager. If you see your controller there, you can skip the rest of this article.
Unfortunately, sometimes just making the connection isn’t enough – both your computer and the BAC will make up random ‘local’ IP addresses, and they won’t be able to find and talk to each other.
The solution is to “share” your Wi-Fi connection temporarily to your Ethernet port. This causes Windows to set up its own local server to hand out addresses, and enables BAM and your BAC to find each other and communicate. We don’t recommend this arrangement for more than temporary setup – you’ll want to invest in a router, perhaps a small travel router like this one that can connect an Ethernet device to a Wi-Fi network – but in a pinch this can get you up and running.
Before getting started, make sure to download BAM from our Downloads page; it’s possible that in some situations this process will cause your computer to not connect to the Internet properly until you’re done configuring your BAC and disable the sharing feature.
- Find the Ethernet port on your Windows 10 computer and plug in your BAC using a standard cable. If your computer is a laptop without an Ethernet port, you can buy an affordable USB adapter like this one from TP-Link.
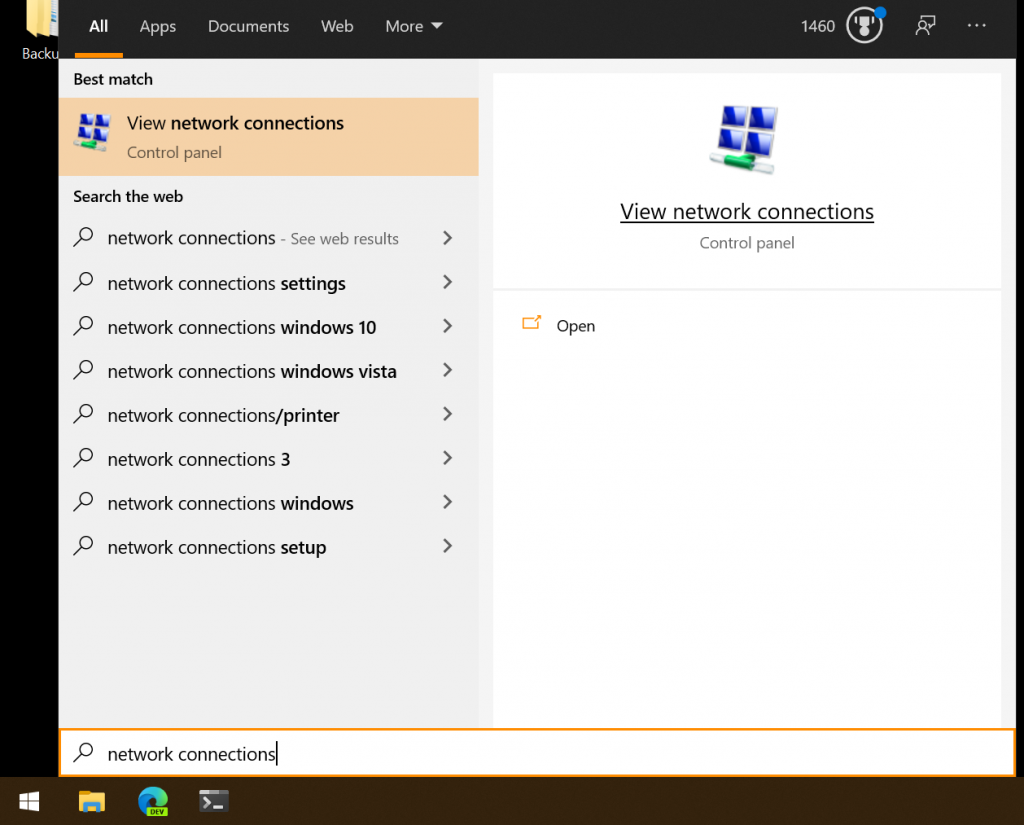
- Open your Start Menu. Search for “Network Connections”, and when “View network connections” appears, select it.
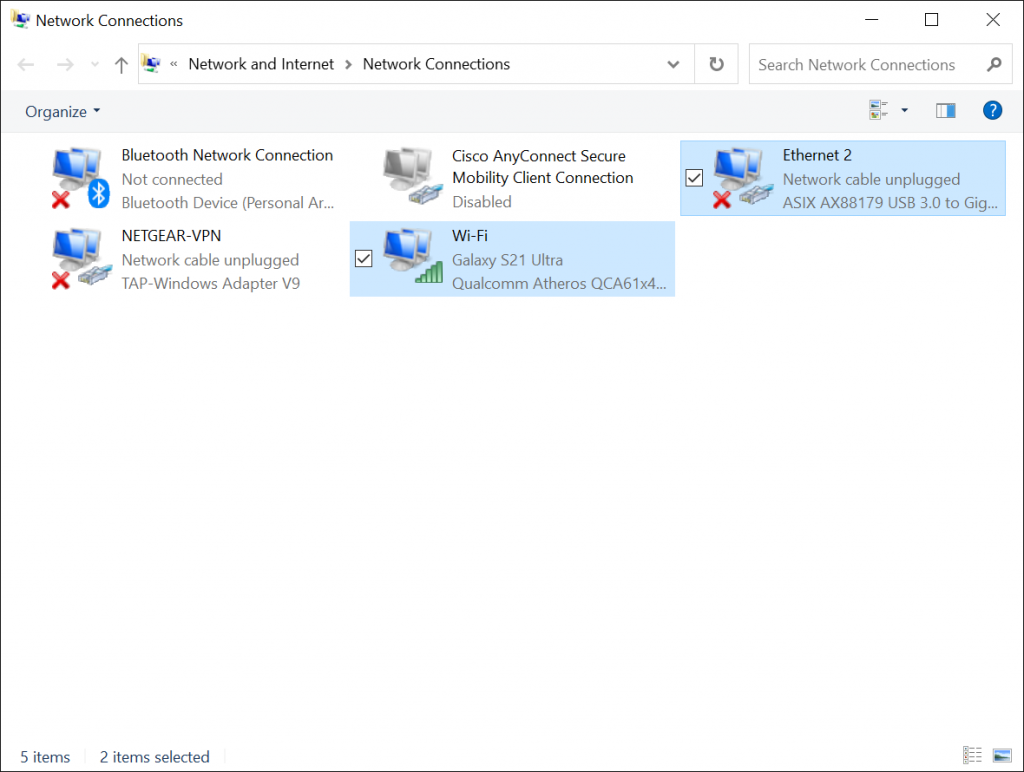
3. In the window that appears, examine the network connections. You may have several, but you’re looking for two connections: your standard Wi-Fi connection that connects you to the Internet, and the second Ethernet adapter that is connected to the BAC.
The Wi-Fi adapter should be easy to find; the Ethernet adapter might be a little harder, but it probably will have “Ethernet” in the name, potentially followed by a number. If you see other items in the list with words like “Virtual” or “VPN”, you can ignore them.
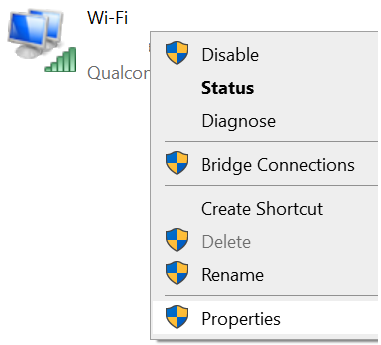
5. Click the Sharing tab.
6. Check “Allow other users to connect through this computer’s connection”. Then, in the dropdown box, choose your Ethernet connection that is plugged into your BAC. Uncheck “Allow other users to control or disable the shared Internet connection.” When you’re done, the dialog should look like this:
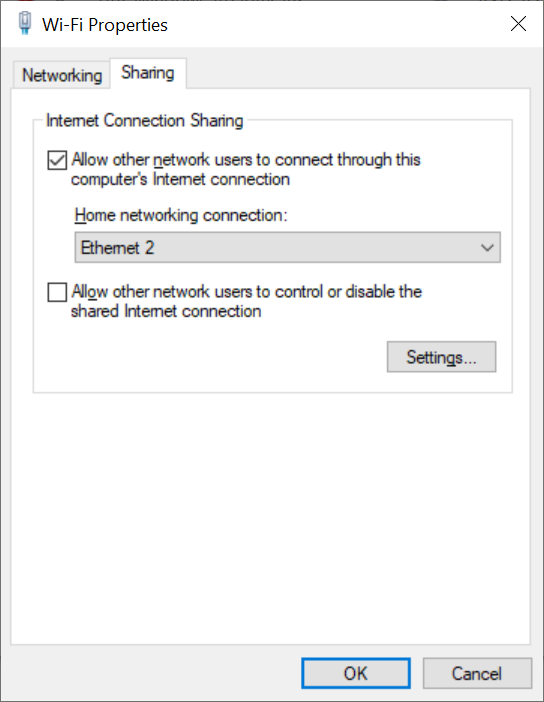
7. Click OK.
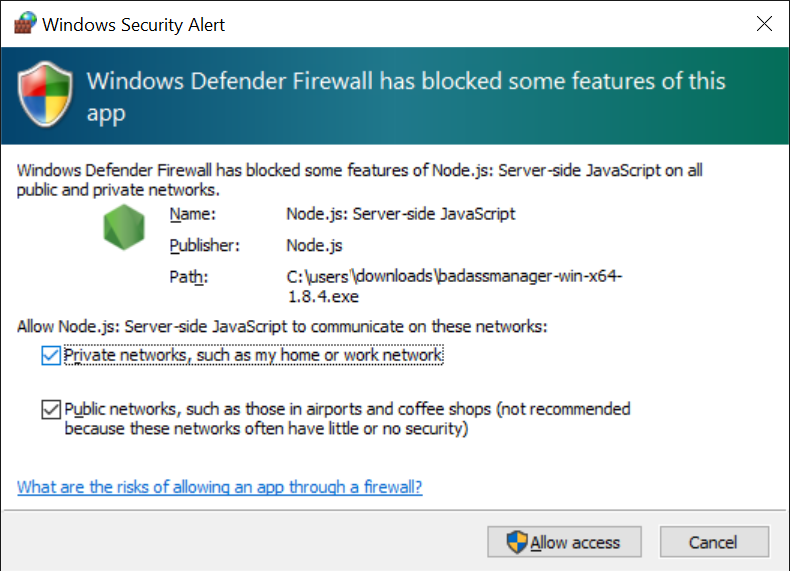
8. Launch BAM. When it opens, you may be asked about firewall access; make sure to permit it to communicate on all network types:
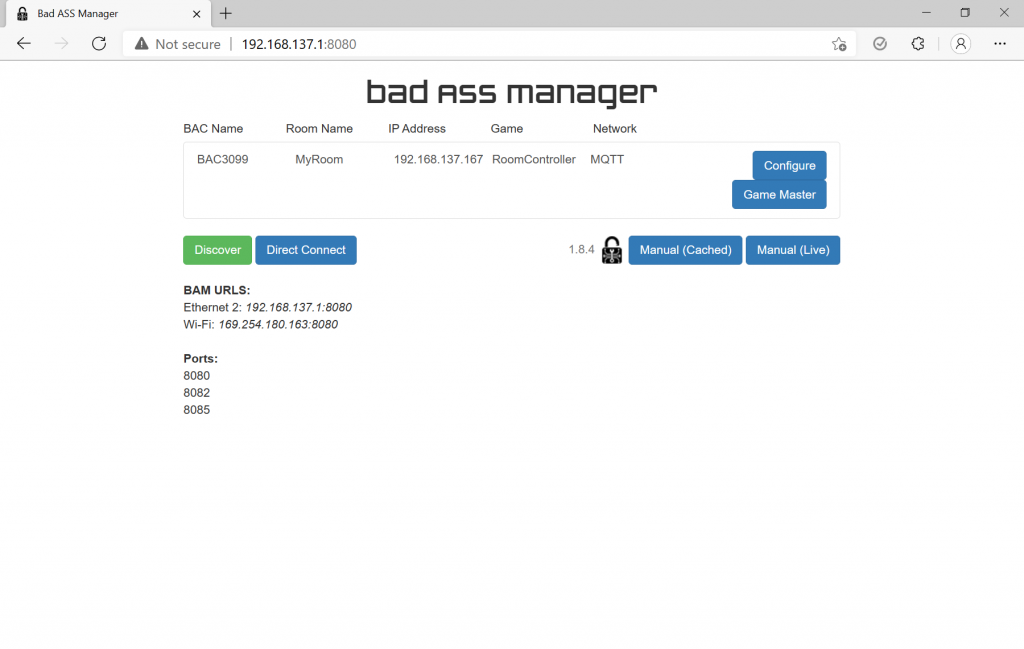
10. If all goes well, you should see your BAC in BAM. If not, try clicking Discover; if it still doesn’t appear, unplug and replug the power to your BAC and wait two minutes, then click Discover again.
Still no luck? Contact our support team and we’re happy to help.
11. Important: when you’re done configuring your BAC, reverse the process by right-clicking your Wi-Fi adapter and unchecking the options on the Sharing tab. If you forget this step, your Ethernet adapter will no longer work for other network connections, and you may even cause problems if you attempt to plug your computer into another network (because your computer will be competing with the network’s router to hand out IP addresses).